
Preparing Your Bike For The "Deep Sleep"
It is my least favourite time of the year. The No More Riding Season, that begins, at least for me, when the salt hits the road. That is a good indication that winter-like weather is here, and black-ice conditions can occur at any time (2 wheels do not work well on Black-Ice).
So, now what? It is prep the bike for its long sleep. The following list is basically what I follow in getting my ride ready for winter, and also thinking of how it will effect its awakening in the spring.
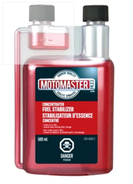
Before I wash my carbureted bike, I again fill up the fuel tank with the best octane rated fuel (no ethanol) and apply the prescribed amount of Stabilizer and shake it for all the same reasons. I then shut off my fuel tap / pet cock, and run the bike until all the gas in the line and carbs is used, and the bike stalls. When the bike cools, I drain what is left in the float bowls. Some would advocate leaving the float bowls full of Stabilized fuel, which I have done in the past without issue.
So, now what? It is prep the bike for its long sleep. The following list is basically what I follow in getting my ride ready for winter, and also thinking of how it will effect its awakening in the spring.
- Determine that you have had your last ride of the year, and stick with it if you can. There will be some times that a warmer spell or thaw may get you itching to ride, but keep in mind the unknowns that could affect that ride. Things such as loose sand or salt residue on the roads which can cause issues for traction, cold road surface that can create black-ice in sun to shaded areas on the road, and the fact other vehicle drivers are not really expecting to see a motorcycle on the highways. These are just a few of the reasons to hunker your bike down.
- Clean your bike – remove all the grit, dirt, whatever. This is not a quick job, it requires you to spend a good deal of fine detailing, especially around the gills of air cooled engines. As well, you may want to remove any plastics, especially in lower areas, to clean them, and the bike, better. This is also a good time to look for any rust or potential issues in those previously covered areas. Once you have completed your cleaning, and used a quality non-scratching cloth / towel to dry off the bike as much as possible (you may even use compressed air to remove water from parts of the bike), start the bike and let it run for about 5 minutes. This will allow the heat of the engine and pipes to aid drying, and should dry out and remove any water that got inside your exhaust system. The main item here is to let the bike dry completely.
- Gas / Petrol Tank – For those of you from across the “pond”, I thought I would add the word “petrol”. This is an area that sparks debate as to what to do. There are many different thoughts as to what is the best method of preparing your gas / petrol tank. The following thoughts are what I do with my bikes, and why, depending on fuel injection or carbureted.
Before I wash my carbureted bike, I again fill up the fuel tank with the best octane rated fuel (no ethanol) and apply the prescribed amount of Stabilizer and shake it for all the same reasons. I then shut off my fuel tap / pet cock, and run the bike until all the gas in the line and carbs is used, and the bike stalls. When the bike cools, I drain what is left in the float bowls. Some would advocate leaving the float bowls full of Stabilized fuel, which I have done in the past without issue.
Other Options – some riders like to drain the fuel tanks completely for the winter. If you do, turn the fuel tap to off and run the bike until stalls. Drain carbs. Try to siphon completely, including the fuel reserve, outside as the fuel fumes create a fire risk and if you have an air compressor with moisture control, blow out the fumes from the tank if you can. Replace fuel cap.
4. Foggy Days – Once you have run the engine for 5 minutes or more (or in the case of draining your carbs and fuel line, until the bike quits), allow the bike to cool for at least an hour, or until the exhaust and engine have cooled to a point they will not burn you, or melt anything touching them. If your bike is going to be stored in an unheated or damp environment, the following becomes even more important.
4. Foggy Days – Once you have run the engine for 5 minutes or more (or in the case of draining your carbs and fuel line, until the bike quits), allow the bike to cool for at least an hour, or until the exhaust and engine have cooled to a point they will not burn you, or melt anything touching them. If your bike is going to be stored in an unheated or damp environment, the following becomes even more important.

Pull all your spark plugs, and spray Engine Fog (petroleum based) into the cylinder heads. Turn the engine over several times with the key (the bike will not start, and you are not holding the spark plugs in your hand – right?). This will lubricate the cylinder heads to prevent rusting. Replace spark plugs. Just keep in mind when you start the engine for the first time, you will get black smoke for a bit as the fog is burnt off. It will not hurt the engine.
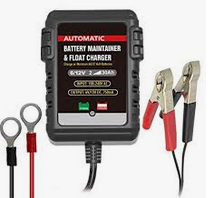
5. Battery – This procedure depends on a number of factors. If stored in a heated garage, and you have access to electrical power, attach a float-charger to the battery if you are going to leave it all winter, and you are all set. If you are going to leave the battery alone, and periodically check its charge and maintain it, attach a trickle charger for a few days, then remove. Continue this process at least once a month. A Float-Charger / Maintainer will maintain your battery by shutting itself down until it senses the batteries charge below a certain level, then it will turn on again to top the batteries charge. A trickle charge is continuous, and after the battery is at full charge, it tries to pack even more charge to it. This can actually damage your battery in the long term. That is why it is best with a trickle charger to use it only several days at a time, then remove.
If in a cold environment, it is best to remove the battery altogether and bring it into a warm environment, i.e. your home. Then attach the float-charger.
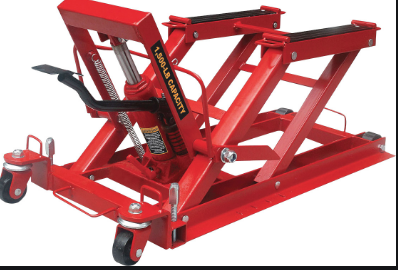
6. Wheels: Give Them A Lift – Fill your wheels to the full pressure recommended by the manufacturer. If the bike is going to be left alone for an extended period of time (at least several months, especially in cold conditions, and especially if your wheels are have spokes), do what you can to lift the bike off the ground so that both wheels are free of the ground. This is easy if you have a centre-stand. Place the bike on it (usually takes back wheel off ground), and make a small stand to place under the front wheel axle to keep it off the ground as well. Cut 2x4’s work well. If you do not have a centre-stand, you can purchase a specified motorcycle lift, place it under the bikes frame (chances are you will have to do some adjustments), secure the bike to the lifting mechanism, and lift the bike up until the wheels leave the ground. Some jacks will require you to go through the full lifting range, while others do not. Make sure to place safety blocks so the lift cannot drop for some reason, and secure your bike even better to the frame of the lift.
If you do not have a centre-stand or a lift, moving the bike at least once a month will help to stop any flat spots from occurring. If you can’t do any of what has been mentioned, lighten the load as much as possible and leave on side-stand.
7. Rust / Corrosion Prevention – If you are going to have your bike in an unheated and / or damp environment, you should take time to lubricate metal parts that could rust, corrode, or get pitted. A thin layer of a petroleum based grease / lubricant (not one with a water component such as WD-40) can be applied to the clean, dry metal parts. This will keep moisture out. Don’t forget to clean the lubricant off in the spring before you go riding. If not, it will attract dirt like a magnet!
8. Cover – Cover your baby with a motorcycle cover designed for the size and / or shape of your bike. If stored inside, your cover is more a dust cover and should be of a breathable membrane to allow air to pass through. This will insure that there is no moisture build up next to your bike.
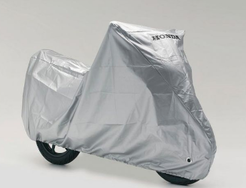
Covered With Breathable Material
So It Looks Like This......
So It Looks Like This......
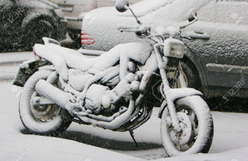
.... And Definitely Not This!
Once you have completed your winter preparation, you can rest easy knowing your baby will sleep peacefully until awakened by an anxious rider in the spring.
